Get ₹500 Off + Free Home Delivery on Your 1st Order Above ₹5,000!
Click Allow to Get Coupon Code & New Updates
Click Allow to Get Coupon Code & New Updates
All you ever wanted to know about bicycles
To assemble the electric ride-on Jeep, refer to the detailed manual included with the product. Additionally, you can watch the provided instructional video for guidance.
To assemble the electric ride-on Bike, refer to the detailed manual included with the product. Additionally, you can watch the provided instructional video for guidance.

our ride-on Jeeps or scooters have a maximum weight capacity of less than 30 to 40 kilograms
For optimal performance, charge the battery for 8 to 10 hours. Avoid exceeding 10 hours of charging time to prevent battery damage. When charging, connect the charger; a red light indicates it's charging, and a green light signifies it's fully charged.
Yes, typically ride-on Jeeps come equipped with seat belts and dual control options, allowing both manual operation by the child and remote control operation by a parent. On the other hand, ride-on bikes usually come with only manual control options.
Common types include foot, calf, neck, knee, seat cushion, chair, and car seat massagers — each targeting specific body areas for pain relief and relaxation.
Yes, most are safe for daily use when following time limits (usually 15–30 minutes per session). Always read the user manual and consult a doctor if you have health concerns.
No, it's not recommended to use electric massagers while driving, as they can distract or impair control. Only use car seat massagers designed for driving and safety-tested.
Most massagers are designed to fit standard body sizes, but some foot, calf, or chair models offer adjustable settings or wider designs for better comfort and fit.
Yes, many massagers — including foot, neck, and cushion models — offer optional heat to enhance muscle relaxation and blood flow.
Noise levels vary. Cushion and neck massagers are generally quiet, while powerful foot or chair massagers may produce light humming or vibration sounds.
It's best to use them on firm, stable surfaces like chairs or floors to ensure proper pressure and performance.
Yes, cushion, neck, and some foot massagers are compact and easy to carry. Larger chair or calf massagers may be bulkier and less portable.
Look for models with removable, washable covers. For others, wipe the surface with a damp cloth and avoid using water near electronic parts.
Many seniors benefit from massagers, but people with conditions like diabetes, circulation issues, or injuries should consult a doctor before use.
If one of our many distributors is located close to where you are, we recommend you try taking a test ride of your preferred bicycle. You can use the store locator to find out which is the nearest store that you can go to: Store Locator. In case there is no store close to you, you can pick the right bicycle on the website. The website features all the tools and assistance required to make your purchase seamless. We also have a host of images including close ups for all bikes from all possible angles for you to explore. And we are proud of our cool AR (Augmented Reality) feature for a couple of bikes to have a real life experience of the amazing Ninety One bikes whereever you are!
The charging time varies between models. The Lead Acid model takes approximately 7-8 hours for a full charge, while the Lithium-Ion model requires approximately 3-4 hours for a complete charge cycle.
When choosing a treadmill, consider key features such as motor power (measured in horsepower), incline options, running surface size, speed range, built-in workout programs, and cushioning. Additionally, check for connectivity options like Bluetooth or compatibility with fitness apps.
Z4: The battery charges up to 80% in 4.5 hours. ZX – 4Hours
Z2, E-Drago, WolverineX: These models charge up to 80% in 3.5 hours.
Meraki 27.5T and 29T: Both Meraki models charge up to 80% in 3 hours.
For a full charge, times may vary slightly depending on usage and conditions.
An all-terrain bike (abbreviated ATB). If you are looking to just ride within the city, consider getting yourself an ATB. These bicycles come with a simple frame geometry, with a raised handlebar that offers you an upright riding position offering the rider a lot more comfort. ATBs also have a large seat that makes riding for longer durations, more convenient. There are also women-specific city bicycles available that are designed keeping in mind a woman's comfort.
Detailed specifications of our E-scooter, including features, dimensions, and performance metrics, are available in the downloadable brochure. To download the brochure, click here.
The space required for a treadmill depends on the model and its dimensions. On average, you should allocate at least 6 to 7 feet of length and 3 feet of width. Be sure to account for additional space around the treadmill for safe use.
All-terrain tires are known for their ability to handle different terrains. They come with grooves and channels that distribute the load evenly, improving the traction. This makes all-terrain tires ideal for snow and ice, sand, and other soft surfaces. However, extreme off roading is not recommended.
Our E-scooter supports a weight capacity of up to 120 kg, ensuring robust performance and stability.
Yes, there are several types of treadmills, including manual, motorized, folding, and non-folding. Manual treadmills rely on your movement for power, while motorized treadmills have an electric motor. Folding treadmills are ideal for smaller spaces, while non-folding models are typically more robust.
Yes, you can ride the electric cycle in mild rain as it has an IP65 rating, which means it's protected against water splashes and light rain. However, we recommend riding cautiously and avoiding heavy downpours or deep water to ensure the longevity of the components and your safety
An ATB is perfect for all terrains. Whether it is unpaved roads or sand, an ATB has you covered. It was originally designed for off-roading experiences however, it soon gained popularity because of its user-friendly and rugged design that made it ideal for Indian roads.
The top speed of our E-scooter is 25 kilometres per hour (km/h), ensuring both efficiency and safety for riders.
Regular maintenance includes cleaning the belt and deck, checking for loose bolts, and lubricating the belt. Be sure to follow the maintenance guidelines provided in your treadmill’s user manual to extend its lifespan.
Yes, you can easily charge your e-bike using a 240V, 5A universal socket—the same type of outlet you use to charge your phone or other household devices. This makes it convenient to charge your e-bike anywhere, anytime. Just plug it into any standard outlet for a hassle-free charging experience.
Yes, all terrain bikes are great for longer rides as they offer an amazing grip and comfort. Since they are designed for different terrains, you can take them with you for weekend trips as well as for your long vacation. They offer great support and an amazing riding experience.
No, a driving license or government registration is not required. Our E-scooter's speed limit is capped at 25 kilometers per hour (km/h), exempting it from these regulatory requirements.
Yes, most treadmills are designed for both walking and running. Ensure you choose a treadmill with a sufficient speed range and cushioning to accommodate your preferred workout intensity.
You'll know the battery is fully charged when the light on the charger turns green. This indicator lets you know that the charging process is complete and the e-bike is ready to ride.
Depending on what your intended use is, you can pick the right hybrid cycle for yourself. For commute: If you are someone who wants to indulge in light off-roading on the weekends and daily commutes to the office, pick a hybrid cycle with a suspension fork as it will absorb bumps on the off roads. For comfort: If you are someone who likes to go on leisure rides, then an upright geometry is perfect for you. This is great for recreational purposes as these bicycles have wider tyres for extra comfort, and some of them even boast luxurious features like a suspension seat post and extra-cushioned saddles. Ninety One Cycles has a range of comfortable hybrid bicycles that tick all the boxes and will ensure you enjoy your riding experience every time you hit the pedal.
For any booking-related queries, please reach out to us at bikes@outdoors91.com.
Yes, we offer warranties on all our treadmills. The specifics vary by model, so please check the product details or contact our customer service for more information.
Yes, the battery is detachable, allowing you to remove it and charge it anywhere, anytime. This makes it convenient to charge the battery indoors or at any location with a power outlet, without needing to bring the entire e-bike.
Hybrid bikes are designed to be a cross between road and mountain bikes. They typically boast of large padded seats and upright handlebars, which make your biking experience comfortable on roads, bike paths, and even some unpaved paths. Hybrid bikes are perfect for city roads as well as weekend trips to the hills. They offer great comfort as well as an amazing riding experience.
Yes, we provide free home delivery for all our treadmills. Our delivery team will ensure that your treadmill arrives safely and is set up in your preferred location.
The e-bike requires mild servicing, and the frequency depends on how often and intensively you use it. For regular riders, a general check-up every 6-12 months is recommended, while more frequent maintenance may be needed for heavy or off-road use. Keeping your e-bike serviced ensures it runs smoothly and prolongs its lifespan.
To figure out what type of hybrid bike is right for you, the first consideration is to know what type of riding you'll be doing: commuting in the city, riding paved paths and smooth streets for a workout, or cruising on a mix of gravel and pavement. You can also pick the right bike for youself after using our sizing tool that will help find you the perfect bicycle for your body frame: Find Your Perfect Bicycle
Consider your fitness goals and workout preferences. For weight loss or intense cardio, a treadmill with higher speeds and incline options might be ideal. If you're focused on light exercise, a basic model may suffice. Our team can assist you in finding the best match based on your needs.
Your e-bike is water-resistant, not fully waterproof. If it gets wet, dry it off as soon as possible, especially around the battery and electrical components. While the e-bike can handle light rain or splashes, avoid submerging it in water or exposing it to heavy downpours for extended periods. For long-term protection, store it in a dry place when not in use.
You can easily access both the User Manual and Warranty Details for your scooter using the links below:
User Manual
Warranty Details
These documents include instructions, safety guidelines, warranty coverage, and customer support information to help you get started confidently.
Hybrid cycles combine the features of the road, mountain, and touring cycles. They are the perfect buy for those who are looking at comfort and versatility. They combine the strength of both, mountain and touring cycles and merge this with the sleek, aero nature of a road cycle. This is why buying hybrid cycles in India is a great choice as it allows you to ride on various terrains. The right type of hybrid cycle largely depends on how you plan to use the cycle.
No, there is no need for an AC to DC converter/adapter. You can connect the treadmill directly to a standard household power circuit.
Yes, our e-bike is designed to handle all types of terrain, thanks to its MTB (Mountain Bike) build and suspension system. Whether you're riding on city streets, rugged trails, or uneven paths, the e-bike’s robust design and suspension provide a smooth and comfortable experience across different terrains. It's built for adventure!
E-bicycles come with a battery-powered assist that comes via pedalling and, in some cases, a throttle. When you push the pedals on a pedal-assist Electric bicycle, a small motor engages & gives you a boost, so you can ride uphill without tiring yourself. The throttle mode, which is a feature in a few Electric Cycle, engages the motor with a press of a button. The throttle allows you to take a break while your bicycle continues to move ahead with the help of the motor. You feel powerful, and acceleration becomes much easier.
No, a separate electrical connection is not required. A normal domestic two-phase connection is sufficient.
There are generally no strict age restrictions for riding an e-bike. However, we recommend that riders be at least 12 years old to ensure they have the necessary skills and judgment for safe riding. Always supervise younger riders and encourage the use of helmets and safety gear!
Electric bike with speed limit of 25kmph and power limit of 250 watts, require no registration. Meraki by Ninety One Cycles qualifies under this criteria and hence doesn't need registration or license to ride.
Yes, our treadmills come equipped with a gel-cushion shock absorption system. For enhanced shock absorption, consider models like Heavy, Panther, Ranger, Focus, Surge, and Solid, which feature a Dura-Spring shock absorption system along with gel-cushions.
Yes, we offer financing options for e-bike purchases through Bajaj Finserv with no-cost EMI, as well as options with HDFC and 18+ other banks. This makes it easier for you to invest in your e-bike while managing your budget effectively!
The assistance from the motor cuts off at the speed of 25kmph, but you can go faster by combining your pedal power in the pedal-assist mode. We suggest that every time you hit the pedal, wear the essential biking gear for your safety and follow the state and city rules.
If your area experiences frequent power fluctuations, a stabilizer is recommended. Otherwise, the treadmill can operate on a normal domestic power supply without a stabilizer.
Yes, technical support is readily available through 91Cares and our extensive network of 1200+ dealers. If you encounter any issues with your e-bike, you can reach out to us for assistance, and our dedicated team will help you get back on the road quickly!
Fat tire bikes provide improved grip and traction on the most troublesome terrain, that's why fat tires make a good impression even when the ground is covered in sand/gravel or even snow. Fat tires are suitable for riding on the mellowest sandy beaches, something that regular MTBs cannot provide. They are definitely a great investment if you are someone who loves carrying their bike for all their road trips. The riding experience that fat tire bikes provide on various terrains is just unbeatable.
While a treadmill mat can provide additional cushioning, it is not necessary since our treadmills already include protective cushioning. However, users may choose to add a floor mat for extra protection based on personal preference.
You can expect to receive your e-bike within 7-9 business days after placing your order. Please note that delivery times may vary based on your location and any unforeseen circumstances. We strive to ensure prompt delivery, so you can enjoy your e-bike as soon as possible!
A fat cycle (also called fat cycle or fat-tire cycle) is an off-road bicycle with oversized tires, typically 3 inches (77 mm) or larger and rims 2.16 inches (55 mm) or wider, designed for low ground pressure to allow riding on soft, unstable terrain, such as sand, bogs and mud. The wide tyres provide you with extra grip and traction and combined with low tyre pressure, you’ll find that you’re able to pedal over terrain that'd make conventional tyres sink.
The treadmill display shows distance, time, speed, incline level, calories burned, and heart rate. If you select a preset program, the display will also show the program details.
Assembly is required depending on your chosen option. If you opt for 99% assembly, the e-bike will be delivered in a ready-to-ride condition, needing minimal setup. If you choose the standard option, the e-bike will arrive in an 85% assembled condition, requiring some additional assembly before you can ride. Either way, you'll be close to hitting the road in no time!
Fat tire bikes float on difficult surfaces and can be used on normal roads also with the same ease especially if they are geared. Although not built and designed for mountain biking, fat tire bikes are a great investment for a variety of different terrains.
The treadmill comes with a 1-year warranty.
To extend battery life and maximize your e-bike's range, consider the following tips:
1. Avoid Deep Discharges: Charge the battery when it drops below 20% to prevent deep discharges, which can degrade battery health over time.
2. Reduce Assist Levels: Lowering the pedal assist levels can help conserve battery power while still providing adequate support during your ride.
3. Maintain Moderate Speeds: Riding at moderate speeds rather than maxing out can enhance efficiency and increase your overall range.
The large volume, low-pressure tires act as great shock absorbers. Since the large tires absorb a lot of the vibration from riding, there is less stress on the rider's hands and lower back. The biggest benefit of a fat tire bicycle is that it can be used on varied terrain, from sand to snow. The wide tires also offer a better grip on the different terrain which would otherwise make conventional tires sink. They are also a great investment to make for a good fitness regime.
To receive your warranty certificate, you need to register your product either on our website or through the Wynd App. Once your registration is complete, the warranty certificate will be sent to you via email.
Battery: The battery comes with a 2-year warranty, ensuring peace of mind regarding its performance and longevity.
Motor: The motor is covered by a 1-year warranty, providing coverage for any manufacturing defects or issues that may arise during regular use.
Electronics: The controller, display, and sensors (PAS) are covered by a 6-month warranty, safeguarding you against any potential issues with these components.
Please refer to our warranty policy for more details on coverage and terms!
A mountain bike (abbreviated MTB) is a bicycle designed for off-road cycling. The heavy-duty construction combined with stronger rims and wider tires has also made this bike type popular with urban riders. It is a great way to navigate through potholes and over curbs. A mountain bike is a great buy for all those who are looking at going on off-roading adventures as well as for those who are going to use their cycle in the city to enjoy their rides bump-free.
We provide door-to-door service for any issues covered under the warranty. You can report the issue to our Customer Care team through our website or by calling our Customer Care number. We will assess the issue and arrange for a technician to visit your home for service.
To start your e-bike, follow these steps:
1. Insert the Key: Begin by inserting the key into the ignition.
2. Press the Power Button: Next, press the power button on the display to turn on the system.
3. Select PAS Mode: Choose your preferred Pedal Assist (PAS) mode and level.
4. Drive Off: Once everything is set, you’re ready to ride—just pedal away!
Enjoy your ride!
A hybrid bike combines the features of the road, touring, and mountain bikes. Perfect for those on the fence who wish to go for something comfortable and versatile, hybrid bikes are great for multiple surfaces. MTBs or mountain bikes are specifically designed for off-roading experiences and are great to ride on steep slopes. These bikes boast a stronger frame and often feature front and rear suspensions which help in off-road performance.
The installation charge for home installation is Rs. 899. The installation fee is non-refundable once the service is completed.
Yes, MTBs are a little heavier than road cycles. However, you need a heavy-duty and stronger framed bicycle when riding off-road and on steep hills. Mountain cycles are meant for a more rugged use and are extremely rider-friendly. They offer you the right amount of safety when riding on a mountainous slope. Their wider tires and larger suspension is what makes them heavier.
We provide an online video guide for all our customers, allowing you to assemble the treadmill yourself in approximately 40 minutes. If you would like professional installation, please contact our Customer Care service (Post Sale Service - 6381356404).
It's a great activity for the arms, back and legs. You work your heart but you're not hurting your joints it's very friendly on the body. Mountain biking pushes your workout routine and cardiovascular activity to a whole new level. Moreover, it is a great form of adventure which allows you to explore the region like you would never otherwise be able to. Mountain biking is a sport but it can also be pursued as a passion.
Typically within 24–48 hours of raising the installation request, depending on your location. which typically takes about 40 minutes.
Delivery typically takes between 5 to 15 days, depending on your location and pin code. Delivery times may be affected by road and weather conditions, as well as connectivity. Orders to remote areas may take longer to arrive.
If the staircase is wide enough and the delivery can be managed safely (subject to the delivery team's assessment), we can arrange for the delivery to your doorstep on the 3rd floor.
Every Ninety One cycle is 85-90% assembled when shipped for its orders. This makes set-up and assembly convenient and less time consuming for our customers. However, getting the assembly right the first time is critical for a great riding experience as well as for safety. This is why we recommend opting for 91 Cares - an initiative by Ninety One Cycles that provides an on-site technician to your home at a nominal cost. 91 Cares ensures you get your bicycle assembled at the comfort of your house by an expert. In case you choose to assemble the bicycle yourself or in a remote scenario where the company in not able to arrange for a technician, we strongly recommend to get the bicycle assembly verified by a local technician.
Yes, we charge a nominal rate for assembly on-site. The charges differ for different bike categories: Kids cycles - Rs.499, single-speed cycles - Rs. 499, geared cycles - Rs. 699, E-bikes - Rs. 999 and KTM bikes - Rs. 1499.
All Ninety One Cycles are dispatched with 85-90% assembly done. The minor assembly that is left has to be done after delivery. A manual will help you get through it or you could also opt for the 91 Cares program which offers to send experts on-site for assembly at a nominal rate.
Each Ninety One Cycles bike that is dispatched is 85-90% assembled. Only a few minor assemblies have to be done by the customer. If you are looking for an expert to help you through this, you can opt for the 91 Cares program where we send an expert technician on-site to help you with the assembly. The assembly of the bike shouldn't take more than an hour, if done by an expert.
Ninety One Cycles has an experience of six years in the industry and over the years has improved in efficiency as well as innovations.
The headquarters of Ninety One Cycles is located in Ahmedabad.
Firstly, congratulations!!! You are going to have a great riding experience with your Ninety One Cycle, get ready to create some fun riding memories. If you have already selected the bicycle of your choice then you can easily place your order on our website. Our customer-first and user-friendly website will assist you through your purchase journey. If you want to buy it from a store, then browse through the list of stores that are close to you: Store Locator
Yes, the Outdoors Ninety One website is secure and offers secure payments. You can safely place an order and make your payment online without being worried about anything. Online shopping for cycles just got easier and more convenient with Ninety One Cycles' user-friendly website.
If you are purchasing your cycle online then you have a plethora of payment choices available. We accept Internet banking, Visa, MasterCard, UPI, Bajaj EMI cards and more at our checkout. We also keep updating new payment methods based on the customer coverage of banks or institutions.
Ninety One Cycles offers several EMI options however, COD is not available. You also have other payment methods like bank transfers, UPI payments and credit & debit cards. The secure payment gateway ensures placing your order is seamless.
No worries. We've got your back! Our excellent customer service will have you back on the road within no time. Our experts are available on call +917506 753 847 (10am - 7pm on weekdays). You can also drop us an email at cares@outdoors91.com.
Our bicycles go through high-quality manufacturing tests before they are dispatched. However, if by any chance you receive a cycle with a manufacturing defect, all our cycles come with a lifetime warranty. All you have to do is register your bicycle post-purchase to claim the warranty. We also recommend reading the terms of the warranty: Warranty. In case you need to report any other issue, you can mail us at cares@outdoors91.com.
In order to adjust the from or the rear disc brakes you first need to understand the built of a disc Caliper. The Disc Caliper comes with two types of pads, the inner and the outer pad. The outer pad is the moving pad wherein the inner pad is a stationery pad. You will find a wire clamping bolt in the rear of the Disc Caliper and a barrel adjuster in the front. To manage the space between the inner and the outer pads, you will need a 5mm Allen key. To tighten the pads, you will need to use the Allen key clockwise and vice versa.
To adjust the disc brakes, you need to loosen the wire clamping bolt. Post that, pull the cable and make sure that there aren’t any lags in the cable. Always note that the Disc Caliper should be parallel to the disc rotor. You need to slightly loosen the Caliper alignment bolts and then using the 5mm Allen key tighten the inner pad making sure that the disc rotor moves freely without rubbing against either of the pads. Now rotate the wheel and hit the brakes and hold on to it until you finish tightening the Disc Caliper alignment bolts. If you are still facing friction with the movement, try loosening the inner pad so that the disc rotor gets adjusted for frictionless movement. For minute adjustment of the outer pad, you can move the barrel adjuster clockwise to loosen it and anti-clockwise to tighten the outer pad. For an in-depth explanation please check the video below.
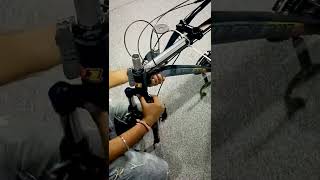
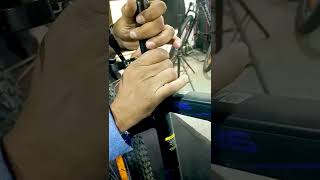
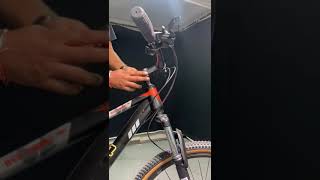
To replace the Stem, first unscrew the four screws in the front of the handlebar using a 4 mm Allen key and let the handlebar loose. Now, slightly loosen the two bolts at the back of the Stem using a 5 mm Allen key and unscrew the top screw also know as cap screw completely using the same Allen key. Now you can easily pull the Stem out of your cycle frame and replace it with a new Stem. While installing the new Stem, slightly tighten the top as well as the two bolts at the back. Once done, try moving the stem and if you notice any movement tighten the top screw further until you notice no movement at all. To fit the handlebar again, first adjust the clamp and then insert all the four screws using bare hands and then tighten the bolts diagonally for a better fitment. For an in-depth explanation please check the video below.

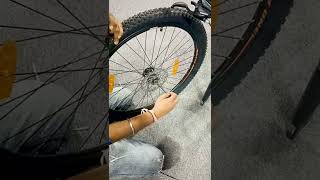
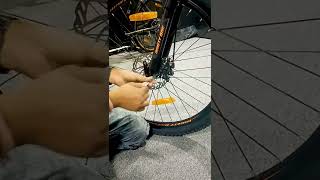
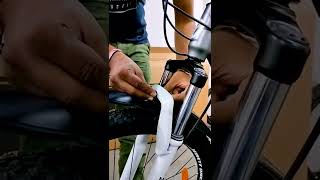
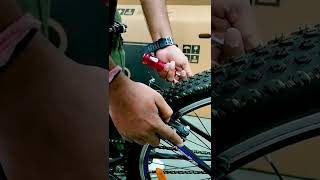
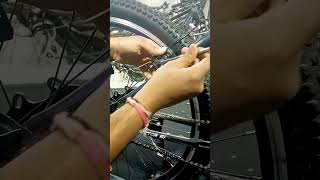
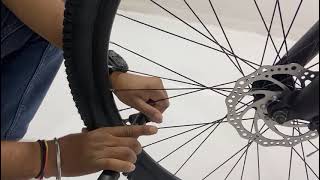
To install the front wheel, first remove the bolt and the first spring in the quick release making sure the second spring is still on the quick release. Now insert the QR from within the slot in the disc brake on the wheel and attach the spring making sure that the small end of spring is on the inside and the bigger end is on the outside and then tighten the bolt against the spring. Once you have completed these steps, take the wheel and attach it properly within the disc calliper slot and the fork and slightly shake the wheel to check the fitting. After the wheel is attached properly, hold on to the bolt and rotate the QR lever clockwise to tighten it. Once tightened properly pull the lever on the top making sure that the QR is now locked and the bike is ready to go. For an in-depth explanation please check the video below.
You should always make sure that your disc brakes are aligned properly to stop or avoid any squeaky noises coming from them. In order to align the disc brake, you first need to loosen the wire clamping bolt. Post that, pull the cable and make sure that there aren’t any lags in the cable and again tighten the wire clamping bolt. Now, slightly loosen the two caliper holding bolts and completely tighten the inner brake pad using a 5 mm Allen key. Once tightened, hold the break lever and tighten the two caliper holding bolts which were earlier loosened so that the caliper doesn’t move out of its place. Now loosen the inner brake pad in a manner that there is no friction or any noise coming from the disc brakes. For an in-depth explanation please check the video below.
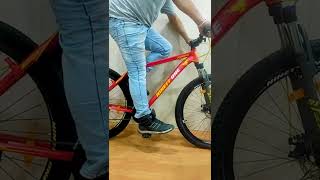
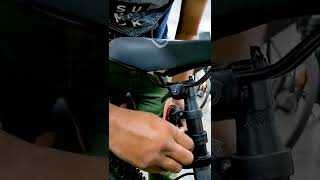
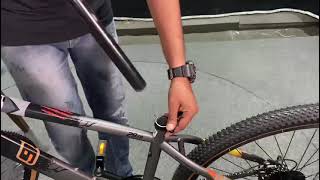
To have a comfortable ride, the seat height matters a lot and the adjustment is always done according to the rider’s height. To find the right size, sit on the cycle and take your right heel at the centre axle of the pedal and take it completely down. Once you are in the right position and you notice that your knee is bending, in that case the seat is not adjusted properly and you will need to take slightly on top. The right position for the seat is when your right heel is at centre axle of the pedal and completely down without your knee bending. For an in-depth explanation please check the video below.
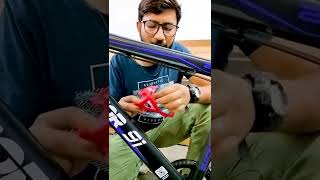
The mounting for the front reflector is always in the front of the holder while the mounting for the rear reflector is perpendicular to the holder. You simply need to take reflectors and slide them on to the mounts until you hear a clicking sound and then mount the front reflector on the handlebar and the rear reflector at the back of your seat. You will need a Phillips screw driver and a self-threading screw while tightening the reflectors at their respective locations.
You need to fix a derailleur guard to protect the rear derailleur from accidental damage. To fix the derailleur guard attach the derailleur guard to the frame dropout mount with the help of the two bolts provided with the guard and tighten them with a screw driver. For an in-depth explanation please check the video below.
To replace the brake caliper, slightly loosen the two caliper holding bolts and then completely loosen the wire clamping bolt. Once the wire clamping bolt is removed, you need to completely loosen the two caliper holding bolts as well. After all the bolts are completely loosened, you will be able to take out the caliper and replace it with a new one. Attach the new caliper properly with the disc and the caliper mount and tighten the two caliper holding bolts completely. Insert the brake wire from within the caliper and tighten it with the wire clamping bolt and your brake is ready to use. For an in-depth explanation please check the video below.
In order to install your seat, take your seat post and insert the thinner end within the seat clamp which is at the bottom of your seat and tighten the clamp nuts with the help of a spanner. After the seat is tightened take your rear reflector and insert it on the seat post and tighten it with the help of a screw driver. Once your seat post is ready you need to insert it inside the seat tube by opening the QR on the seat tube, now rotate the QR clockwise to tighten the seat post and adjust the seat height according to the rider’s height. For an in-depth explanation please check the video below.

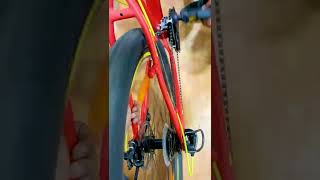
The function of the front derailleur is to shift the chain properly on the chain ring and to hold on to the chain. The derailleur should be mounted at a distance of minimum one mm from the chain ring and maximum 3 mm from the chain ring. The distance cannot be lesser than one mm or more than 3mm. Always make sure that the derailleur is in parallel with the chain ring, in case if it is not parallel you can loosen the derailleur mounting bolt and adjust it accordingly align it.
You will see to limit screws on the derailleur, the screw on the outside is known as the lower limit screw and the one on the inside is know as the higher limit screw. To adjust the lower limit screw, shift the front and the rear gear on one and adjust the lower limit screw in such a way that it doesn’t not interfere with the inner guide (you can tighten or loosen accordingly). To adjust the higher limit screw, shift both the front and the rears gears on their top limit and adjust the higher limit screw in a way that it doesn’t interfere with the outer guide (you can tighten or loosen accordingly). You will find a barrel adjuster near the gear shifter; you need to pull and rotate it anti-clock wise to tighten and clockwise to loosen the barrel adjuster. If you are facing difficulties in shifting the gears upwards, you need to tighten the barrel adjuster and if you are facing difficulties in shifting gears downwards, you need to loosen the barrel adjuster. For an in-depth explanation please check the video below.
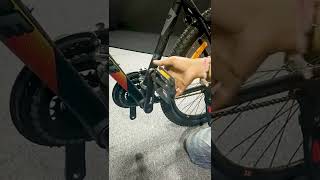
You will receive two pedals along with the cycle, one for the left side and one for the right. Both the pedals will have a marking to indicate the right and left. You will need insert the pedal in to the crank arm and rotate it clock wise. Once you feel it is slightly tightened, use a 15mm spanner to tighten the pedal completely. Do this for both the sides and you are good to go. For an in-depth explanation please check the video below.
In order fix the bottle holder, first unscrew the two bolts on the frame and insert them within the two holes on the bottle cage. Now place the bottle holder on the frame and tighten the bolts using a 4 mm allen key. For an in-depth explanation please check the video below.
In order to change the suspension, you will first need to remove the brake caliper using a 5 mm allen key. Once the caliper is removed, you need to remove the front wheel by loosening the QR and removing it completely out of the wheel. Once the wheel is out, its time for the stem. In order to remove the stem, first loosen the two bolts at the back of the stem and then completely unscrew the top screw also know as cap screw and you can now pull the handle out along with the stem. Place the handle at a side and remove the two spacers out. Now with slight force push the suspension downwards and remove it out. Now take the new suspension and insert it within the frame, insert the two spacers from the top in the same order when removed. Now you can attach the handlebar back, make sure that all the wires are in the front while attaching the handlebar. Once the stem is attached take the top screw and tighten it, after that check the alignment of the handlebar and tighten then two bolts at the back as well. Once the handlebar is completely fitted, take the wheel and attach it with the fork with the help of the QR. Now attach the brake caliper using the caliper holding bolts and tighten it properly to make sure smooth movement of the brake. Please ensure that the handlebar is aligned properly and also check if the brake is working properly once the bicycle is completely ready. For an in-depth explanation please check the video below.
In order to install the rear mud guard, first unscrew the bolt at the front of the mudguard and once you’ve completely unscrewed the bolt, take the mudguard and attach it correctly to the seat tube. Now tighten the bolt at the back to tighten the grip of the mudguard. You can use the other two bolts to change the arrangement of the mudguard according to your needs. For an in-depth explanation please check the video below.
In order to install the front mudguard, you will need a multi-spanner and a screw-driver. Take the front mud-guard and remove the screw attached on it. Now insert the mudguard within the gap between the wheel and the suspension in a manner that you can tighten the nut and bolt correctly. Once you have tightened the bolts, you can use your hand to make any minor adjustments to the attached mudguard. For an in-depth explanation please check the video below.
In order to adjust the V-brakes, make sure that both the brake lever and the brake caliper move at the same time when you hit the brakes. In case you find either of them not moving then you can either tighten the screw on the non-moving part or loosen the screw on the moving part. As you are tightening the non-moving part continuously hit the brakes to ensure both the caliper and the lever are moving together. For an in-depth explanation please check the video below.
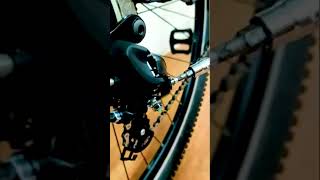
You will find the barrel adjuster and the cable clamping bolt on the rear derailleur as well, along with the two limit screws with the markings as “H” and “L”. At the top of the derailleur, you will find the “B” tension screw and the bottom you will find two pulleys namely Jockey pulley and Idler pulley. The function of the limit screws is to ensure the left and right limits while the derailleur is moving. When you tighten the “H” limit screw, you will notice the derailleur moving inwards and vice versa. The “L” limit screw helps you determine the inside limit of the derailleur, so when you tighten the “L” limit screw it moves towards the frame and when you loosen it, it moves inwards. Always make sure to shift to the first gear while adjusting the “L” limit screw. For minor tuning you can use the barrel adjuster and adjust the derailleur by moving it either clockwise or anti-clockwise. For an in-depth explanation please check the video below.
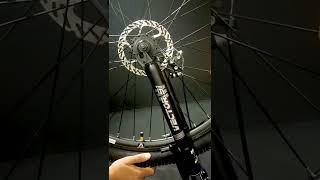
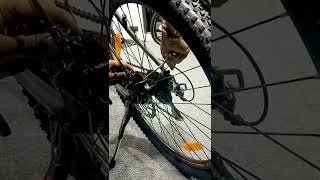
While attaching a new front wheel, you first need to pull out the safety packing material on both sides with your hands. Now remove the bolts and the washers on both the sides and attach the wheel correctly within the slot of the disc brake. We recommend doing this while your cycle is turned upside down as it is easier to change the wheel that way. Once the wheel is attached insert the lock washer correctly within the given hole and tighten the bolt along side with the help of a 15 mm spanner. For an in-depth explanation please check the video below.
To attach the seat clamp to the seat, you first need to loosen the bolt on one side of the clamp and remove it along with the attachment. Now plug the clamp in to the seat and add the attachment and the bolt manually on the other side. You will need a spanner to tighten the bolt completely. Now take your seat post and insert the thinner end within the seat clamp which is at the bottom of your seat and tighten the clamp nuts with the help of a spanner. Once your seat post is ready you need to insert it inside the seat tube by opening the QR on the seat tube, now rotate the QR clockwise to tighten the seat post and adjust the seat height according to the rider’s height. For an in-depth explanation please check the video below.
To replace the V-brake caliper, you first need to remove the end cap of the brake wire with the help of a plier. Now with the help of a 10 mm spanner loosen the wire holding bolt and you will see that the wire will come out automatically. Once the wire is out, you need to remove the caliper holding bolts with the help of a 5 mm allen key. While attaching the new caliper make sure to attach it within the centre point on the frame for better experience. Now attach the caliper holding bolt with bare hands and then tighten it with the help of a 5 mm allen key. With the help of a 6 mm allen loosen the brake pad bolt in order to align it correctly making sure its parallel with the wheel and then tighten it again. Now attach the spring in its holder and take the brake wire through the wire clamping bolt and slightly tighten the bolt with the help of a spanner. Attach the other side of the caliper to the wire and tighten the wire clamping bolt. In case you find either of them not moving then you can either tighten the screw on the non-moving part or loosen the screw on the moving part. As you are tightening the non-moving part continuously hit the brakes to ensure both the caliper and the lever are moving together. For an in-depth explanation please check the video below.
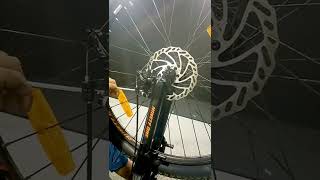
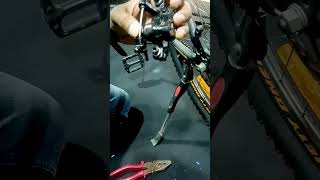
To change the disc pads, we recommend removing the disc caliper using a 5 mm allen key. Once the caliper is removed, straighten the lock on the caliper with the help of a plier and remove the pin out. Now you can slightly push the disc pads in order to remove them. While replacing the pads, make sure that the size and the pattern of the new pads are same as that of the old ones. Attach the new pads in the opposite direction and insert the pin which was removed earlier and lock it again with the help of a plier. You can now install the caliper back on the frame with the help of the caliper alignment bolts and a 5 mm allen. For an in-depth explanation please check the video below.
In order to replace the disc brake caliper, first you need to take end cap of the brake wire and remove it with the help of a plier. Now slightly loosen the wire clamping bolt with the help of a 5 mm allen key and once loosened, you now need to loosen the two caliper alignment bolts completely so that you can remove the caliper out. Now take the new caliper and align it carefully with the frame and attach the two caliper alignment bolts and tighten them using a 5 mm allen key. Now take the brake wire through the barrel adjuster and the wire clamping bolt and tighten the wire clamping bolt using a 5 mm allen key. For an in-depth explanation please check the video below.
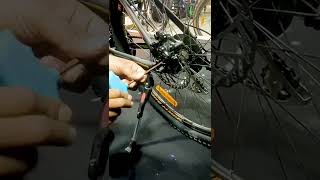
To adjust your rear disc brake, you need to loosen the wire clamping bolt. Post that, pull the cable and make sure that there aren’t any lags in the cable. You need to slightly loosen the caliper alignment bolts and then using the 5mm Allen key tighten the inner pad making sure that the disc rotor moves freely without rubbing against either of the pads. Now rotate the wheel and hit the brakes and hold on to it until you finish tightening the disc caliper alignment bolts. If you are still facing friction with the movement, try loosening the inner pad so that the disc rotor gets adjusted for frictionless movement. For an in-depth explanation please check the video below.
To install a bicycle seat QR (quick release), follow these steps:
1. Gather the necessary parts: You will need a seat clamp, QR skewer, QR washer, and bolt.
2. Begin by placing the curved part of the QR washer onto the seat clamp. This curved part should fit snugly against the clamp, creating a stable surface for the QR to lock onto.
3. Insert the QR skewer rod into the seat clamp, ensuring that it goes through the holes or slots on both sides of the clamp.
4. Tighten the lock bolt on the QR skewer rod to secure it in place. Use a suitable tool, such as an Allen key or a wrench, to tighten the bolt firmly. Make sure the QR skewer is securely fastened to prevent any unwanted movement.
5. With the seat clamp and QR skewer in place, position the bicycle seat onto the seatpost. Align the seat rails or brackets with the seat clamp.
6. Once the seat is in position, partially tighten the QR skewer bolt. This will hold the seat in place but still allow for adjustments.
7. Adjust the seat to your preferred height and angle. Ensure it is comfortable and aligned properly for your riding position.
8. Once you have adjusted the seat, fully tighten the QR skewer bolt. Make sure it is tightened securely, but be careful not to overtighten and risk damaging the seatpost or QR mechanism.
9. Test the seat by applying some pressure to it, ensuring that it is stable and doesn't move or wobble excessively. Adjust as needed until you are satisfied with the seat's stability.
Following these steps should enable you to install a bicycle seat QR properly. Always double-check the tightness of the QR skewer bolt before each ride to ensure the seat remains secure and safe.
Installing a rear mudguard clamp on a bicycle can help protect you from splashes and dirt while riding. Here are the steps to install a steel clamp for a mudguard:
1. Remove the seat: Start by removing the bicycle seat. This is typically done by loosening the bolt or quick-release mechanism that secures the seat post to the bike frame. Once the seat is loose, you can slide it out of the seat tube.
2. Attach the clamp: Take the steel clamp and position it around the seat tube, just below the seat post collar. The seat tube is the vertical tube that extends from the bike frame and holds the seat post. Make sure the clamp is aligned properly and centered on the tube.
3. Secure the clamp: Once the clamp is in position, you need to tighten it securely. This can be done by using a screwdriver or an appropriate-sized wrench to tighten the bolt on the clamp. Gradually tighten the bolt until the clamp is snug and firmly attached to the seat tube. Be careful not to overtighten, as it may damage the clamp or the bike frame.
4. Reinstall the seat: With the clamp securely in place, you can now reattach the bicycle seat. Slide the seat post back into the seat tube and adjust it to your desired height. Ensure that the seat post is inserted far enough into the tube for a safe and stable seating position.
5. Secure the seat: Once the seat is in the desired position, tighten the bolt or engage the quick-release mechanism to secure the seat post to the clamp. This will prevent the seat from moving or sliding during rides.
It's important to note that the specific installation process may vary depending on the type of mudguard clamp and bicycle you have. Always refer to the manufacturer's instructions or consult a professional if you're unsure about the installation process or encounter any difficulties.
Using a mini pump for tire inflation, such as the one from Ninety One Cycles, is relatively straightforward. Here's a step-by-step guide:
1. Identify the valve type: The mini pump typically comes with two nozzles - one for Presta valves and one for Schrader valves. Determine which valve type your tire has before proceeding.2. For Schrader valves: Schrader valves are commonly found on MTB cycles or scooters. To attach the pump, locate the larger portion of the Schrader valve. Listen for the sound of air coming out, indicating that the valve is open. Press the pump nozzle onto the valve and lock it in place securely. Ensure a tight fit to prevent air leakage.
3. Begin pumping: Hold the pump firmly in place with one hand while using your other hand to operate the pump handle. Start pumping air into the tire, maintaining a consistent pumping motion. Be careful not to bend or twist the pump, as it may cause damage.
4. Inflate to the desired pressure: Continue pumping until you achieve the desired tire pressure. Check the tire pressure using a pressure gauge if available, or simply gauge it by feel.
5. Remove the pump: Once the tire is adequately inflated, unlock the pump from the valve by twisting or releasing any locking mechanism. Gently pull the pump nozzle off the valve, ensuring a smooth removal without applying excessive force.
6. For Presta valves: If your tire has a Presta valve, which is commonly found on road bikes or thinner valve stems, there are a few extra steps involved.
A. Open the Presta valve: Unscrew the small knurled nut on top of the valve stem. This will release the valve, allowing air to enter.
B. Disassemble the valve: The Presta valve consists of a rubber part and a plastic part. Remove both parts from the valve stem. The larger plastic part is the valve cap, while the smaller rubber part is the valve core.
C. Reattach the valve parts: Place the rubber part and the larger plastic valve cap back onto the valve stem. Ensure a secure fit by tightening the knurled nut on top of the valve stem.
7. Inflate the tire: Attach the pump nozzle to the Presta valve by pressing it onto the valve stem and locking it securely. Pump air into the tire, maintaining a consistent pumping motion. Be careful not to bend or twist the pump during the process.
8. Inflate to the desired pressure: Continue pumping until you reach the desired tire pressure. Use a pressure gauge or gauge it by feel.
9. Remove the pump: Unlock the pump from the valve by twisting or releasing any locking mechanism. Gently pull the pump nozzle off the valve, ensuring a smooth removal without applying excessive force.
By following these steps, you can effectively use a mini pump like the one from Ninety One Cycles to inflate your tires, whether they have Presta or Schrader valves. Remember to always refer to the specific instructions provided with your mini pump for the best results.
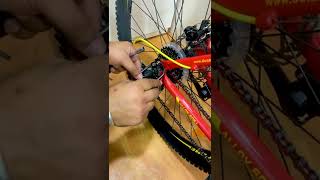
When it comes to properly positioning the front brake wire during bicycle installation or assembly, there is a simple solution. Here's a step-by-step guide:
1. Identify the issue: During installation, if the front brake wire makes a single turn and remains on the backside, it can cause rubbing against the tire, resulting in damage and difficulties while turning.
2. Locate the brake wire bolts: Look for the two bolts on the back of the brake caliper. These bolts secure the brake wire in place.
3. Loosen the bolts: Use a 5mm Allen key to loosen the two bolts on the back of the brake caliper. Loosen them enough to allow for adjustment.
4. Rotate the wheel: With the bolts loosened, rotate the front wheel a full 360 degrees. As you rotate the wheel, ensure that the brake wire rotates in the same angle.
5. Position the wire from the front: As you rotate the wheel, you will notice that the brake wire comes in from the front side, away from the tire. This clears the area and prevents any rubbing or damage.
6. Align the handlebars: Use the 5mm Allen key to align the handlebars with the front wheel. Make sure the handlebars are straight and centered.
7. Tighten the bolts: Once the handlebars are aligned, tighten the two bolts on the back of the brake caliper securely using the 5mm Allen key. Ensure they are tightened enough to hold the brake wire in place.
By following these steps, you can properly position the front brake wire during bicycle installation or assembly. This will prevent any rubbing against the tire, reduce the risk of damage, and ensure smooth turning. Remember to always use the appropriate tools and follow any specific instructions provided with your bicycle.
If you're experiencing issues with your bicycle's gear shifting, particularly when it's not shifting to the 7th gear despite being set to that position, there are a few troubleshooting steps you can follow. Here's a guide:
1. Identify the issue: If the gears are not shifting to the 7th gear but are functioning properly in other gear positions, the problem may not be related to the gear tuning but rather to the gear guard or derailer.
2. Check for obstructions: Examine the area around the derailer and gear guard. Look for any objects, debris, or misaligned components that may be obstructing the movement of the derailer.
3. Adjust the gear guard: If the gear guard is interfering with the derailer's movement, you can make a simple adjustment. Gently pull the gear guard away from the derailer to create a small gap between them. You don't need to provide excessive space, just enough to allow the derailer to function smoothly.
4. Test the gear shifting: Once you have created the gap between the gear guard and derailer, test the gear shifting by changing gears. You should now find that the gears can shift into the 7th gear smoothly.
5. Fine-tune if necessary: If the gear shifting is still not optimal, you may need to fine-tune the gear adjustments. This involves making minor adjustments to the tension of the gear cables or adjusting the limit screws on the derailer. Refer to your bicycle's user manual or seek assistance from a professional bike mechanic for more detailed instructions on fine-tuning the gears.
By following these troubleshooting steps, you can address gear shifting issues where the bicycle is not shifting to the 7th gear. However, if the problem persists or you are unsure about making adjustments yourself, it is recommended to consult a bike mechanic who can diagnose and fix the issue correctly.
When it comes to adjusting the front derailleur on your bicycle, there are a few key steps to follow. Here's a guide:
1. Identify the issue: If your front derailleur is not shifting smoothly or is rubbing against the chain when changing gears, it may need adjustment. Pay attention to any cross-chain issues or clearance problems that you observe.
2. Locate the adjustment bolt: Look for the 5mm bolt on the front derailleur. This bolt is typically used to adjust the position and clearance of the derailleur.
3. Loosen the bolt: Using a 5mm Allen key, loosen the adjustment bolt slightly. This will allow you to make the necessary adjustments to the derailleur's position.
4. Make position adjustments: While keeping an eye on the clearance between the derailleur and the chain, reposition the front derailleur as needed. If it is rubbing against the chain when in a particular gear combination, move the derailleur slightly outward to increase clearance. If there is too much clearance, move the derailleur slightly inward.
5. Secure the adjustment: Once you have made the necessary position adjustments, tighten the adjustment bolt. Ensure that the derailleur is firmly secured in its new position.
6. Test the shifting: Shift through the gears to check if the front derailleur is shifting smoothly without any rubbing or chain interference. Make adjustments if necessary by repeating the previous steps.
7. Fine-tune if needed: If the shifting is not optimal or requires further adjustment, you may need to fine-tune the front derailleur. This can involve adjusting the limit screws on the derailleur or fine-tuning the cable tension. Consult your bicycle's user manual or seek assistance from a professional bike mechanic for more detailed instructions on fine-tuning the front derailleur.
Remember, front derailleur adjustments can be sensitive, so it's important to make small, incremental changes and test the shifting after each adjustment. If you're unsure about making the adjustments yourself, it's recommended to seek the help of a bike mechanic for a more precise setup and fine-tuning of the front derailleur.
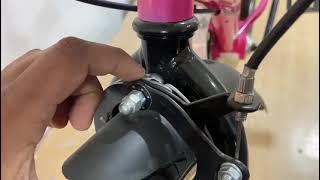
When it comes to adjusting caliper brakes on your bicycle, there are a few steps you can follow. Here's a guide:
1. Identify the issue: If your caliper brake is working on one side but touching or not engaging properly on the other side, it may require adjustment.
2. Check for a gap: Examine the area behind the bolt that holds the caliper brake in place. Look for a gap between the brake arms on both sides.
3. Adjust with the easiest method: If there is a gap behind the bolt on both sides and the brake is working properly, you can use the easiest method. No further adjustment is necessary in this case.
4. Manual adjustment: If there is an issue with one side of the caliper brake touching or not engaging properly, you will need to make a manual adjustment.
5. Loosen the rear bolt: While holding the caliper brake in place, manually loosen the rear bolt that holds it. This will allow you to make adjustments to the positioning.
6. Center the middle part: Ensure that the part in the middle of the caliper brake is centered between the brake pads. This will help create an even gap on both sides.
7. Tighten the rear bolt: Once the middle part is centered, tighten the rear bolt securely. Make sure it is tightened enough to hold the caliper brake in its new adjusted position.
8. Test the brake: Squeeze the brake lever to check if the caliper brake now engages properly on both sides. There should be even contact between the brake pads and the rim.
9. Fine-tune if necessary: If the brake still requires further adjustment, you may need to fine-tune the caliper brake. This can involve adjusting the tension on the brake cable or fine-tuning the position of the brake pads. Consult your bicycle's user manual or seek assistance from a professional bike mechanic for more detailed instructions on fine-tuning caliper brakes.
Remember, caliper brake adjustments can be sensitive, so it's important to make small adjustments and test the brake after each adjustment. If you're unsure about making the adjustments yourself, it's recommended to seek the help of a bike mechanic for a more precise setup and fine-tuning of the caliper brakes."
If the store already has the cycle that you have picked, you can take on-the-spot delivery. We suggest checking the store timings before leaving the house.
If you have already selected the bike of your choice then you can easily place your order on our website. Our customer-first and user-friendly website will assist you through your purchase journey. If you want to buy it from a store, then browse through the list of stores that are close to you: Store Locator
Every Ninety One cycle is manufactured and tested with the highest quality standard. We are proud to say that finding a flaw in our cycle is quite rare. For any manufacturing defect or missing/defective components, you can drop us an email at cares@outdoors91.com. We don't accept return/exchange but we will support you for any issue/defect with your Ninety One cycle.
A cycle with gears lets you choose the gear ratio depending on the terrain you are riding on. For instance, if you are riding on a slope, a lower gear ratio lets you ride uphill easily by increasing your pedalling rate while decreasing your effort. You can also shift gears on a plain road to increase your RPM (rotations per minute) without pedalling too hard. Geared bicycles in India are a great investment if you are truly passionate about cycling and pursue it a little further than leisure riding.
Ninety One Cycles uses different gears in its cycles like Shimano, Microshift, LTWOO. All of these are considered to be the best in the market and are known for their extraordinary performance.
A cycle with gears lets you choose the gear ratio depending on the terrain you are riding on. For instance, if you are riding on a slope, a lower gear ratio lets you ride uphill easily by increasing your pedalling rate while decreasing your effort. A single-speed or non-geared cycle is a bicycle without any gear and has a single gear ratio. The speed that you can reach on such bikes depends completely on how fast or slow you pedal.
Yes, you must pedal while you change gears. That's because the chain has to be moving in order for the derailleurs to "derail" the chain from sprocket to sprocket. Pedal at a brisk pace. A brisk pace improves your stamina on a longer ride, and it enables you to “jump” if you need to suddenly move quickly. Plus, this technique is easier on your bicycle. Third, and this is hugely important, lighten the pressure on the pedals when you shift. You still have to be pedalling while you shift gears, but don't be pedalling hard as you change them. Lightening the pressure on the pedals facilitates a much smoother, more quiet shift. This technique too is easier on your bicycle.
Gears on a bicycle are one of those lovely inventions that allow us to ride faster, get up hills more easily and allow us to get a lot more enjoyment out of our riding. Gears convert the effort you put in at the pedals to a certain output at your wheel. There's only so much force your muscles can produce and usually an optimum cadence (how fast you spin your pedals) at which you will be most efficient. The size of the gears, and how they are combined, determines how many times the rear wheel turns and how far you travel with every pedal stroke. If you have your chain on the smaller chainring and it has 25 teeth, along with a rear cog of the same the wheels rotate once for every pedal stroke. It's a 1:1 gear ratio. If you shift to your big chainring, and it has 50 teeth, then that's a 2:1 ratio. Then every pedal stroke makes the wheels rotate twice. A lower, easier gear, with the smaller chainring up front and a larger cog in the back, lets you accelerate faster. This helps you get started from a stop, or when you are climbing a steep hill. The higher, harder gear (big chain ring, small cog) helps you increase your top speed, but requires more work and muscle to accelerate.
Cycling is a great form of exercise to reduce weight. It can be adopted by those who are struggling in the gym or even those who prefer outdoor activities over gym workouts. Cycling helps burn calories within the first 30 minutes of hitting the pedal, so it is a great way to stay in form.
Yes, cycling is a great way to burn fat and lose calories. The outdoor activity is an excellent physical activity as well as aids mental wellness.
Even though it depends a lot on your body type, cycling makes your legs stretch and your overall height will increase by a few inches owing to this. Cycling burns many calories, so along with cycling when you eat the right food, it will help your body get into the right shape and will help build muscles. The calf muscles become healthier and active cycling results in longer legs as well as an increase in height.
Cycling is one of the top three ways of losing belly fat. The stubborn belly fat is extremely difficult to get rid of however, cycling remains an effective way to lose it. Cycling not only gets your heart rate up but also has the capacity to burn a significant number of calories. Health experts suggest that regular cycling can burn more calories and thereby help you lose weight.
It is recommended that you must at least cycle for a span of 30 minutes for your body to start burning calories. According to Harvard Health Publishing, a 70-KG person can burn 446 calories in just 30 minutes by cycling at a speed of 16 to 19 mph. Burning excess calories aids weight loss. Cycling is a great form of workout to help you lose weight and also give you a break from the monotony of life.
Electric Cycle make bike riding fun and more convenient especially when you are on a steep slope and want to reduce the pressure on your knees and joints. With a motor that takes up for you when you need a break, you can easily shift to the throttle mode if you are too tired. This helps relieve stress on your knees, hips and joints.
Cycling will help your child develop their leg muscles and strengthen their bones. The continued exercise will help build their stamina and improve their cardiovascular development. It will also increase their coordination and balance. Riding a bicycle is something all children should be able to experience. Moreover, cycling is a great teacher of different life lessons that children can learn and apply to their growth.
Cycling is a great form of exercise for children too. It not only helps them get involved in a sport early on in life but also helps develop a healthy body teaching them several life lessons. A child usually learns to cycle between the age of 3 and 8 with an average of just over 5 years old.
Congratulations on your purchase of Ninety One Cycles. You can log in to your account to track your order and get all your updates. You can also click here: Track My Order to track your order and estimate the delivery.
You must ensure that your cycle is clean not only to maintain basic cleanliness but also for your safety when riding on steep slopes. If you have been riding in the hills/mountains and have been caught in rain, then you should definitely wash your bicycle everyday that you spend there. Cleaning a bicycle s just like washing your car/cycle, use a garden hose to clean it, apply soapy water with a brush and scrub away all the grit and grime from the frame, wheels and drive-train.
Disc brakes have come a long way in the last 10 years. They have really evolved into a brake that will stop a tandem as well as a cantilever. A disc brake consists of a metal disc, or "rotor", attached to the wheel hub that rotates with the wheel. Calipers are attached to the frame or fork along with pads that squeeze the rotors for braking. As the pads drag against the rotor, the wheel - and thus the bicycle - is slowed. Disc brakes may be actuated mechanically by cable, or hydraulically.
There are disc brakes and rim brakes. There are various advantages of disc brakes. Disc brakes provide increased stopping power and stay cleaner. They also allow wider tire options.
"Linear-pull brakes" or "direct-pull brakes", commonly referred to as "V-brakes", are a side-pull version of cantilever brakes and mount on the same frame bosses. However, the arms are longer, with the cable housing attached to one arm and the cable to the other. As the cable pulls against the housing, arms are drawn together. V-brakes were specifically designed for off-road use on a mountain cycle.
A cantilever, technically, is a structural element supported at one end. A cantilever brake is a rim brake where each brake arm has the brake shoe and the cable attachment, both on the same side of the support (the pivot). So that the cable can come from above the tire, the pivot must be below the brake shoe, attached to the frame. Cantilever brakes were used on touring cycles and tandems for decades before mountain cycles were even invented. The cantilever evolved into an extremely powerful and reliable braking system.
Yes, Electric Cycle can be used without pedalling when you shift to the throttle mode. Although, it is not recommended to do this for a long duration as it will considerably reduce the range and of course, it will beat the whole purpose of cycling. Pedal-assist mode is much more fun than throttle mode.
You can ride an Electric bicycle without the use of battery just like a normal cycle. The effort required will be slightly more than normal cycles because the battery tends to increase the overall weight by 5-6kgs.
In pedal-assist mode, the motor gives a boost to your pedalling effort. The idea of providing a motor is to reduce tension in your body when you are tired. You can easily push back to the pedal-assist mode and continue pedalling. So, riding an Electric bicycle is definitely not cheating. It just enables you to do a lot more with a bike.
Depending on your location and pin code, the delivery can take anywhere between 5 to 20 days. It also depends on road, weather conditions as well as connectivity. Remote areas may take longer to receive their orders.
We have multiple warehouses and the location from where your order will be delivered is dependant on your location.
No, delivery timelines are defined based on the pin codes. We are dependant on third party logistics providers for delivery, so it wouldn't be possible to deliver any sooner than our pre-determined timelines.
Yes, except Leh, Ladakh, Andaman & Nicobar islands and certain parts of Kashmir, we deliver all across India.
You can opt for 91 Cares for on-site inspection of your bikes in case of any breakdown, post-purchase. This can be availed at a nominal rate. You can also reach out to us in case of any problems. You can email us at cares@outdoors91.com or call us on 1800 572 9191 from Monday to Friday (10 am - 7 pm).
Aluminium alloy frames are generally stiffer than steel, resulting in a harsher ride. When fractions of a second count, track racers prefer that rigidity. But for getting to the store over city streets steel offers a more forgiving ride. No frame material is more durable than steel. The right bike frame will depend on your usage.
There are different types of cycles available at Ninety One Cycles: Road bikes, city bikes, mountain bikes, fat tire bikes, all terrain bikes, e-bikes. To know more about them, keep checking our blogs that have a detailed information and updates on all things bicycles.
The key feature of the snow leopard is its lightweight aluminium alloy frame. It allows you to overcome all the obstacles that await you on your off-road adventure. The comfort of lock-in and lock-out suspension gives you the power to zoom through gravel roads without any discomfort. The Shadowfax was the lord of all horses. He understood human speech and was said to run faster than the wind. This MTB encompasses the spirit of this great horse. It will understand its owner’s comfort and do everything possible to ensure you are safe while you enjoy your mountain trail.
We have multiple dealers who could be running deals and offers at different times which we may not even be aware of. If you are getting a good offer from a registered dealer, you can go ahead with it.
The right size bicycle can make a whole lot of difference to your cycling experience. It is essential to understand that the important parameters that define the bicycle size you choose are - - Purpose/ Usage - Height & Weight. If you are confused about which size is best for your body frame, we have a great bicycle sizing tool available to assist you. So, go ahead and pick the bicycle that is made just for you: Find Your Perfect Bicycle
Our helpful bicycle sizing tool helps you pick the cycle that is perfect for you. If you are confused about the cycle best for your child as per his/her body frame, then check out: Find Your Perfect Bicycle. This sizing tool will ensure you get the right bicycle for your child for a seamless riding experience.
